Creating your optimal Ergonomic Workspace

Spending long hours sitting at a poor workspace setup can often cause fatigue and pain. The correct ergonomic workstation could reduce aches, boost productivity and improve overall well-being. Because one size does not fit all, there needs to be flexibility in how we sit at computer workstations. This visual guide will help you set up your workspace to best suit your individual needs.
When first changing your workstation and sitting posture, you might experience some pain and stiffness due to the new positions. Should you develop severe and lasting pain from making ergonomic changes to your workstation, this could indicate the need to consult with a medical professional of your choice for a thorough assessment.
The information in this guide is not meant to replace a medical assessment but instead suggests ways to optimise your workstation and daily habits to your benefit. If you are currently suffering from or receiving treatment for a musculoskeletal condition, we recommend you first consult your physiotherapist for advice on these suggestions’ suitability.
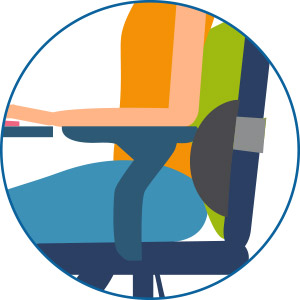
STEP 1. Setup your Chair and Desk
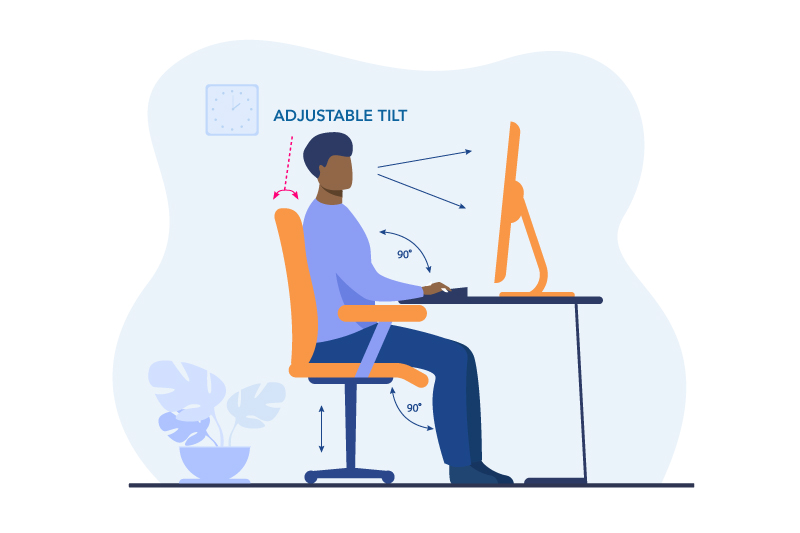
- Ideally the backrest should have adjustable tilt and lumbar support to help maintain the natural curve of your spine.
- Sit with your hips all the way to the back of the chair, so that your lower back and shoulder blades are in contact with the backrest. Consider using a lumbar support pillow or rolled towel if your chair lacks proper lumbar support.
- The armrest height should not prevent you from getting close to your desk.
- Choose a chair with a firm but comfortable seat cushion.
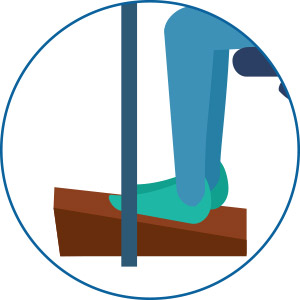
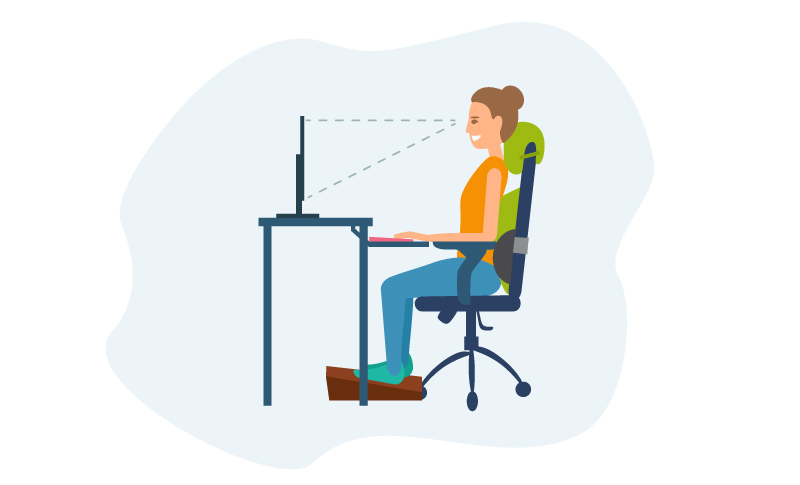
- When seated with your back supported, adjust your seat height so your knees are level or lower than your hips and your feet resting flat on the floor.
- Your legs should fit comfortably under your desk. If the desk is too low and can’t be adjusted, place sturdy boards or blocks under the desk legs.
- If your chair is too high for you to rest your feet flat on the floor, or the height of your desk requires you to raise your chair, add a footrest.
- Ensure there is a 2-4 finger gap between the front of the chair and the back of your knees.
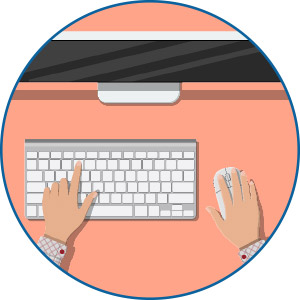
STEP 2. Keyboard and Mouse
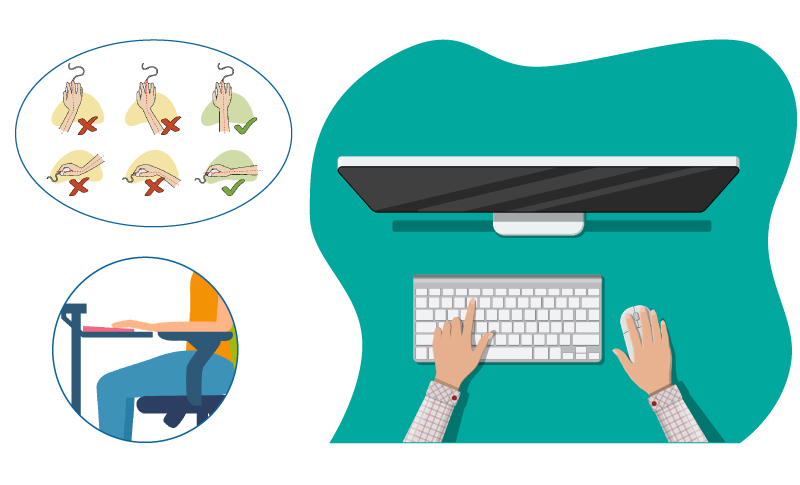
By regularly changing your wrist position, you could also protect your wrist from overuse injuries. Find your most comfortable wrist postures by experimenting with different keyboard and mouse positions.
- Adjust your work surface or chair so your keyboard and mouse are at elbow height.
- When using your keyboard and mouse, keep your wrists straight, and not extended on an angled keyboard or bending sideways because the mouse is either too close or far away from you.
- Position your keyboard directly in front of you, close to the edge of the desk, but still allowing enough space for the wrists and forearms to rest on the desk.
STEP 3. Monitor
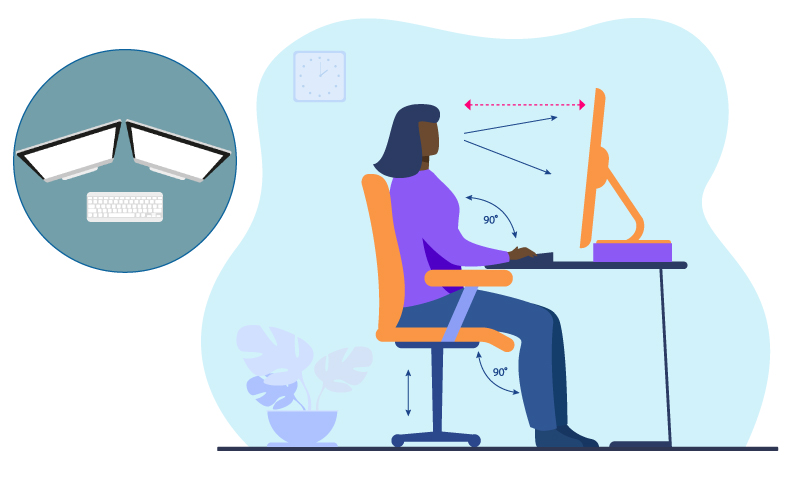
- Position your monitor directly in front of you, about an arm’s length away. Putting it too close might strain your eyes, while placing it too far away may make you slouch forward to read.
- Position dual monitors that are used at equal frequency in an arc right next to each other, and at the same height and distance from you.
- The top of the screen(s) should be set at or just below eye level to reduce visual fatigue and help you maintain optimal neck posture.
- If you wear bifocals, lower the monitor an additional 2-5cm for more comfortable viewing.
- Most monitor stands can be adjusted, if not, insert a box, textbooks, or copy paper to lift your monitor.
- Adjust the font size or display, so that the content can be read clearly.
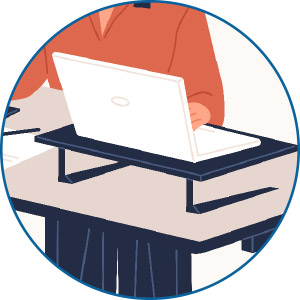
STEP 4. Laptop Users
Although laptops are portable and allow you to work anywhere, they can make the optimal ergonomic setup more of a challenge.
Setting the screen at the correct height can make the keyboard too high, causing strain on the wrists or shoulders. If the keyboard position is correct, the screen might be too low, causing you to hunch forward.
If you’re using a laptop for long periods or as a desktop replacement, consider using separate components that allow for more appropriate posture and can be independently adjusted.
Components include docking stations, laptop stands, external keyboard and mouse.
STEP 5. Accessories

If you frequently talk on the phone and type or write simultaneously, place your phone on speaker or use a headset rather than cradling the phone between your head and shoulder.
Step 6. Take Regular Movement Breaks
There is no perfect posture or workstation setup that can be used all day. Spending extended periods in any static posture puts stress on the body and can lead to fatigue and contribute to injury and pain.
The good news is that by taking regular breaks to move and change postures throughout the day, we can actually reverse the effect of static work postures and reduce pain risk.
Remember: Your next posture is your best posture.
Tips to help you move more while at work:
- Take regular short breaks from sitting and move around for a few minutes. It would be best if you got up from your desk at least once an hour
- Do a few stretches at your desk
- Take a walk break and go for a 10-30min walk
- Walk and talk - walk around while taking phone calls
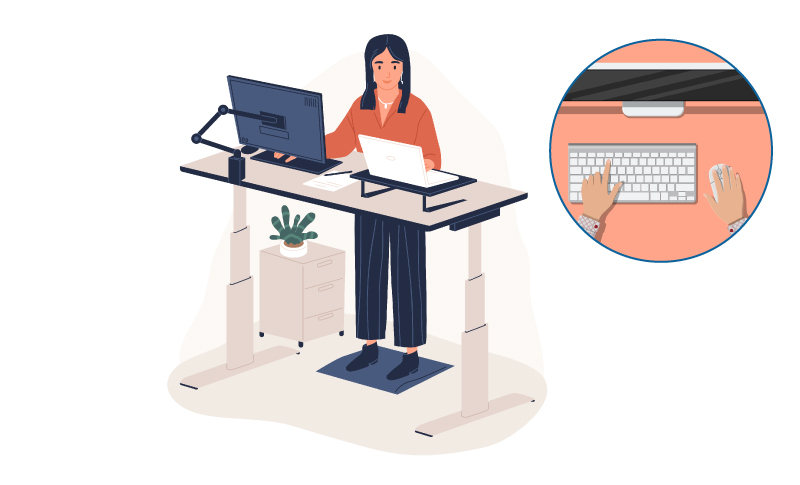
- Consider a sit-to-stand workstation
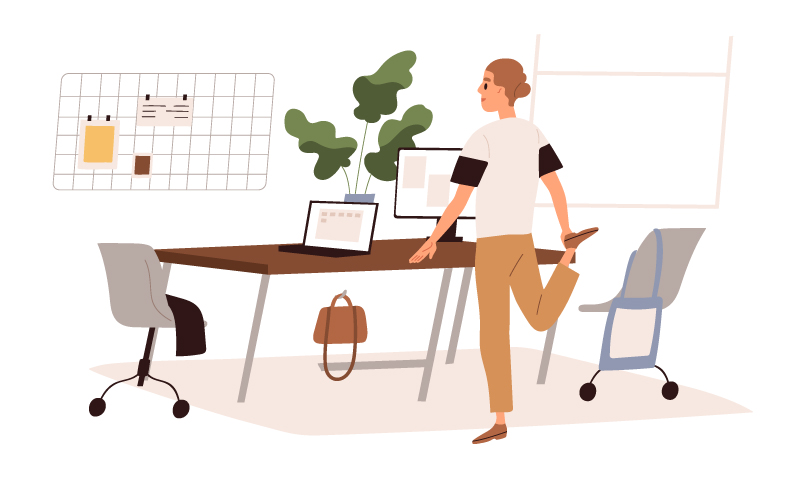
- Try some of the desk detox exercises below
Our bodies thrive on movement. However, should any of these exercises cause you lasting pain, a visit to your local Physiotherapist should help identify why this is happening.
Desk Detox Exercises
Shoulder Rolls
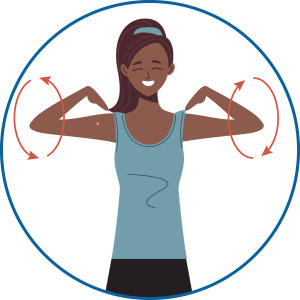
Place your fingers on your shoulders. Roll your shoulders backwards by making big circles with your elbows. Repeat 10 times. Do the same movement in the opposite direction.
Trunk Rotation
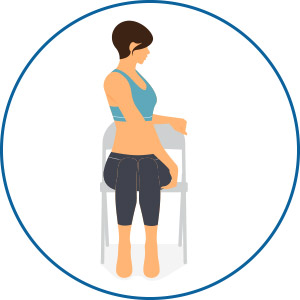
Sit on a chair with your feet firmly on the floor. Twist your trunk side to side, let your head follow the movement. Repeat 10 times on each side.
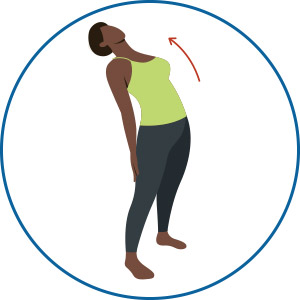
Head Retraction
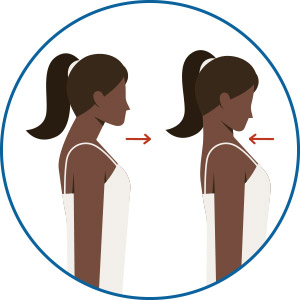
Sit or stand upright. Tuck your chin in and move your head back without tilting your face up or down. Feel the stretch at the back of your neck. Repeat 10 times, moving further into the range with each repetition.
Kneeling Hip Stretch

Start in a kneeling lunge position with one knee on the mat and the other leg bent 90 degrees in front with your foot flat on the floor. Shift your weight forward until you feel a stretch in the front of your kneeling hip and thigh. Hold the stretch for 5 counts. Repeat 10-20 reps, trying to move further into the range with each repetition.
Knee Hugger

Sit on your chair or stand with your back against a wall. Pull your leg up and hug your knee to your chest. Hold the stretch for 5 counts, repeat 10 times each side.
Back Bends
In standing, place both hands on your lower back. Lean back as far as you can. Repeat 10 times, trying to move further into range with each repetition.
Heel Rises
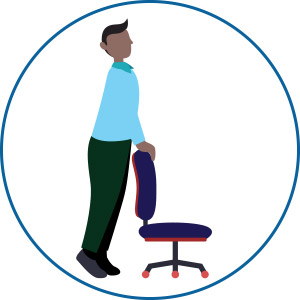
Stand holding the back of your chair. Push up onto your toes. Repeat 10 times.
Squats
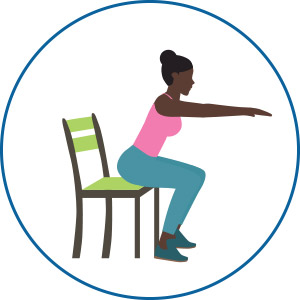
Easy: Chair squats – Stand up from your chair, sit back down only touching your bum to the chair and stand back up again. Repeat 10 times.
Advanced: Deep squats – hold your desk for balance and squat down as low as you can go, stand back up again. Repeat 10 times.
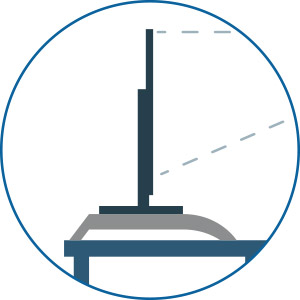
Work-from-Home Equipment
Laptop stand or docking station
Monitor Stand
You could also use textbooks, a wooden crate/box or copy
paper to raise your screen